
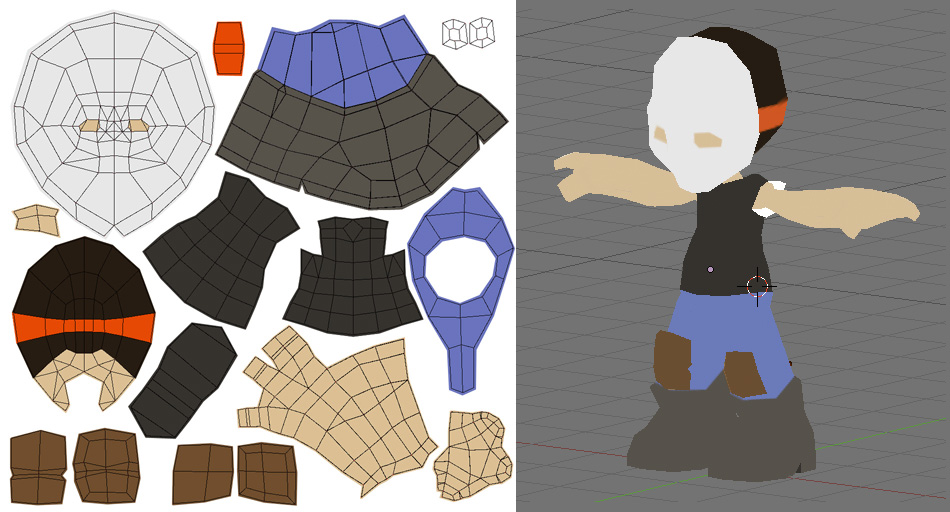
Step 1. Color blocking
Here's where I go through and put down solid colors. When you apply it to your character, it's going to look like CRAP. That's because there's no lighting or details.
Step 2. Basic shadows and highlights
Some games utilize lighting, others don't. I like to paint in my lighting directly on the character. And I usually paint as if the light source is from above. I take liberties with that rule, though. If something needs a bit of highlight, I try to go for it. It's amazing how much better the character looks with some subtle gradients hinting at a light source.
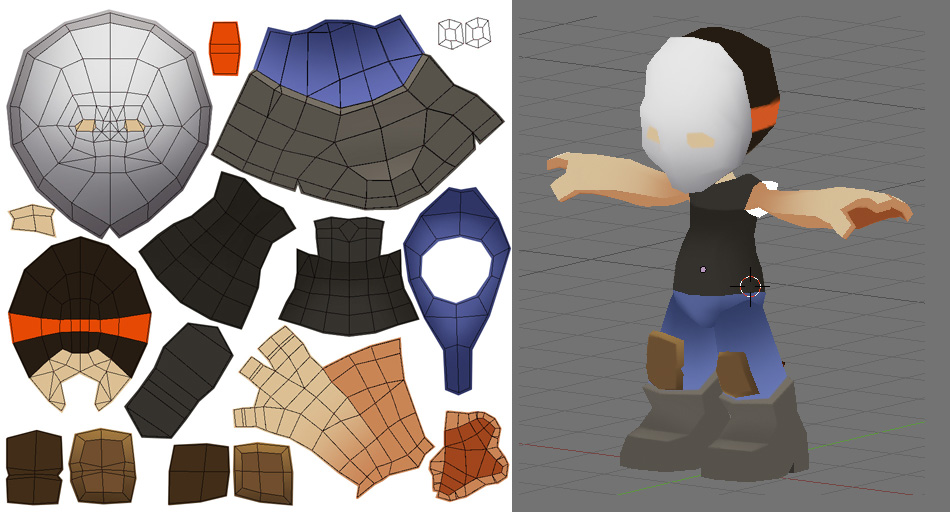
Step 3. More shadows and highlights
I continue on with the process of adding more shadows and highlights. These characters are blocky by design, so I don't mind using harsh shadow lines in some places.
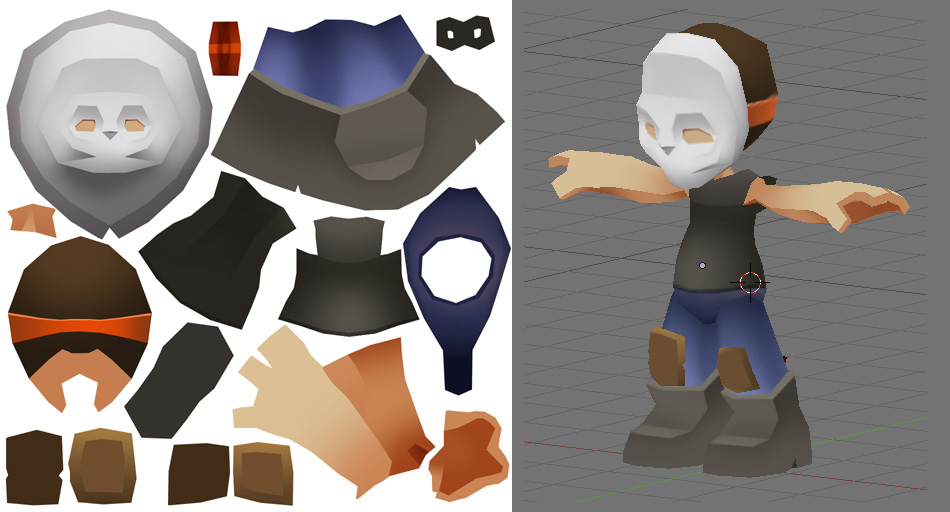
Step 4. Details
Here I start trying to lay down a lot of the detail work in order to further develop the character. At this point, I also start thinking about contrast, and I try to push the shadows even further. The character was screencapped before this stage of texture was done, that's why he doesn't have eyes.

Step 5. More Details
At this point, I pulled out my tablet and started painting in some clothing shadows, the kind of stuff I can't easily do with a mouse. Even more details are added.
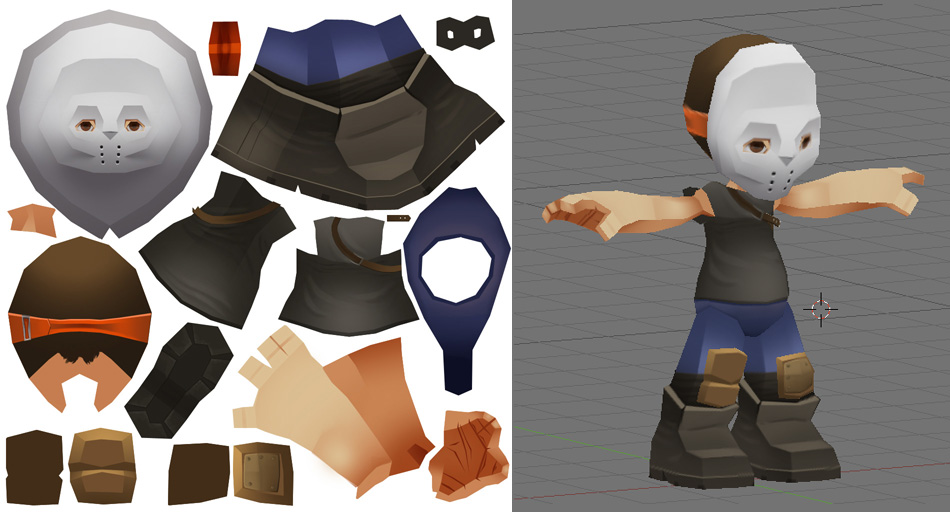
That's where he stands so far. I have some hair to figure out.
No comments:
Post a Comment