
Showing posts with label low poly. Show all posts
Showing posts with label low poly. Show all posts
Tuesday, March 25, 2014

Sunday, July 17, 2011
ShermanCG, Swords

I stumbled upon this fantastic set of swords done by Isaiah Sherman. I really appreciate the progressive change in the designs. The textures are sweet, too. Looking forward to seeing more from this guy. Check out the link to his page, there are wireframes, textures and concept sketches for this set.
ShermanCG, Swords
Tutorial, Video Game Prop Modeling
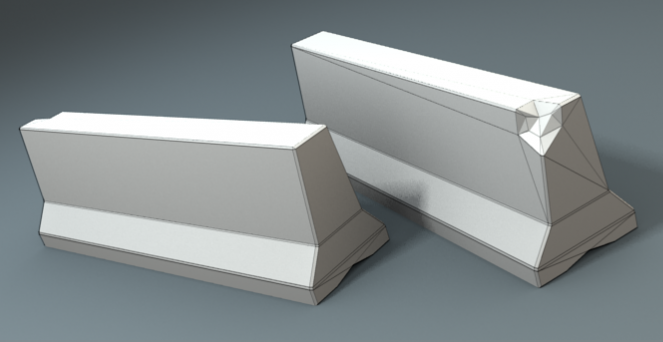
I found a simple tutorial over at BlenderCookie. While the model itself isn't the most exciting, he goes over a lot of the fundamental thinking that is involved when modeling props for video games. It's important to remember that optimizing your model for the lowest amount of polygons, while still maintaining the basic shape of your model, should be the most important thing. The video is a bit lengthy but there's a lot of useful techniques, including keystrokes for the UV layout that I wasn't aware of.
Part 01
Part 02
Saturday, July 16, 2011
FF9, Bestiary
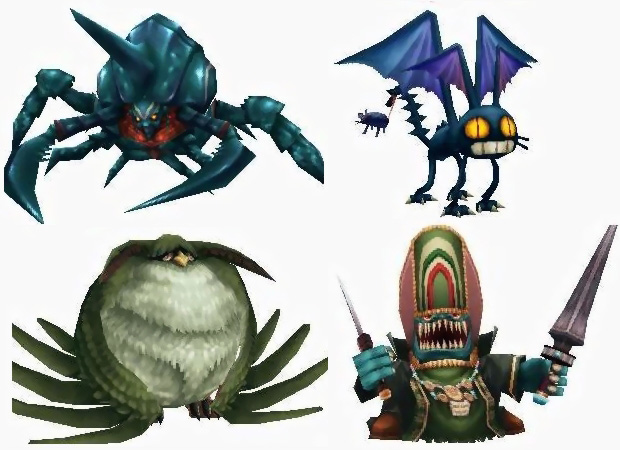
I've always admired Squaresoft's work in their video games, as well as the world created for Final Fantasy IX (for the most part). Here's a grid of the enemies you encounter throughout the game. The images aren't too big, and I wish there were some wireframes and texture examples out there somewhere, but this is a decent reference.
edit: I noticed the last link doesn't work anymore. Here's a new one: FF9 Bestiary
Monday, March 21, 2011
Tutorial/Reference: Texturing Casey Jones
I thought it'd be handy if I documented some of the steps I take when texturing a character. Click on any picture to see a larger version. Keep in mind, there's many steps in between. I often have to try different highlights and reload it to the character to make sure it works. These are the major steps.
Step 1. Color blocking
Here's where I go through and put down solid colors. When you apply it to your character, it's going to look like CRAP. That's because there's no lighting or details.
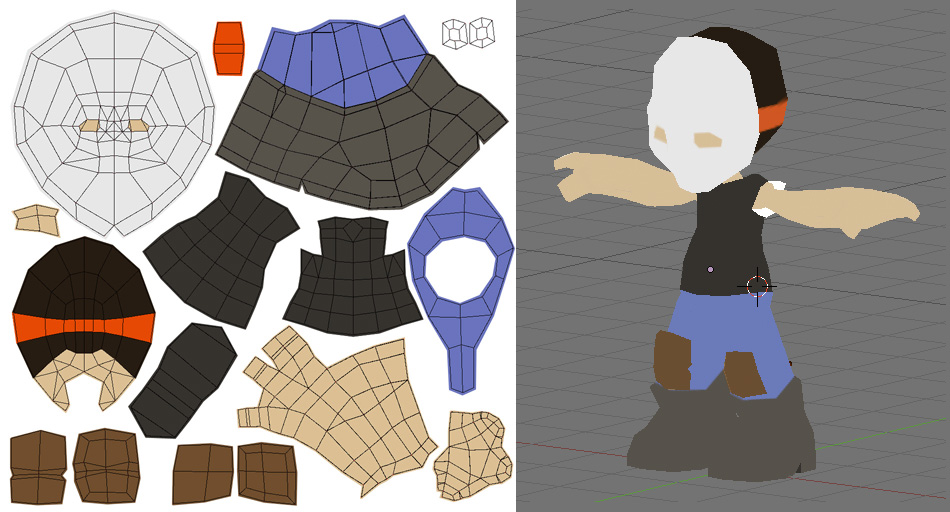
Step 2. Basic shadows and highlights
Some games utilize lighting, others don't. I like to paint in my lighting directly on the character. And I usually paint as if the light source is from above. I take liberties with that rule, though. If something needs a bit of highlight, I try to go for it. It's amazing how much better the character looks with some subtle gradients hinting at a light source.
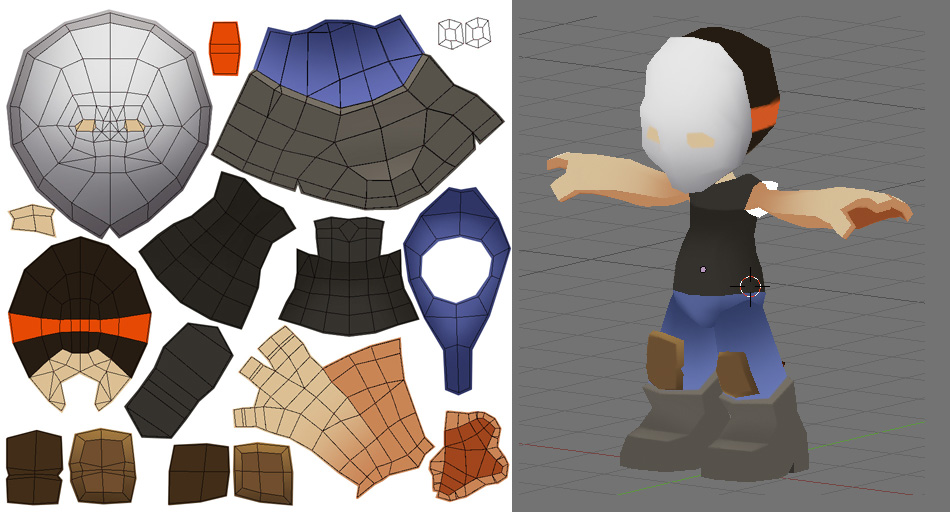
Step 3. More shadows and highlights
I continue on with the process of adding more shadows and highlights. These characters are blocky by design, so I don't mind using harsh shadow lines in some places.
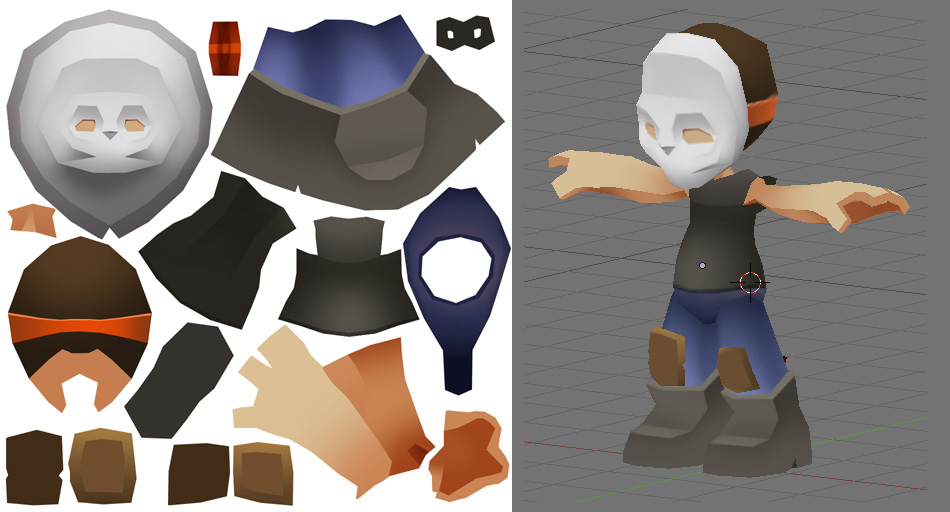
Step 4. Details
Here I start trying to lay down a lot of the detail work in order to further develop the character. At this point, I also start thinking about contrast, and I try to push the shadows even further. The character was screencapped before this stage of texture was done, that's why he doesn't have eyes.
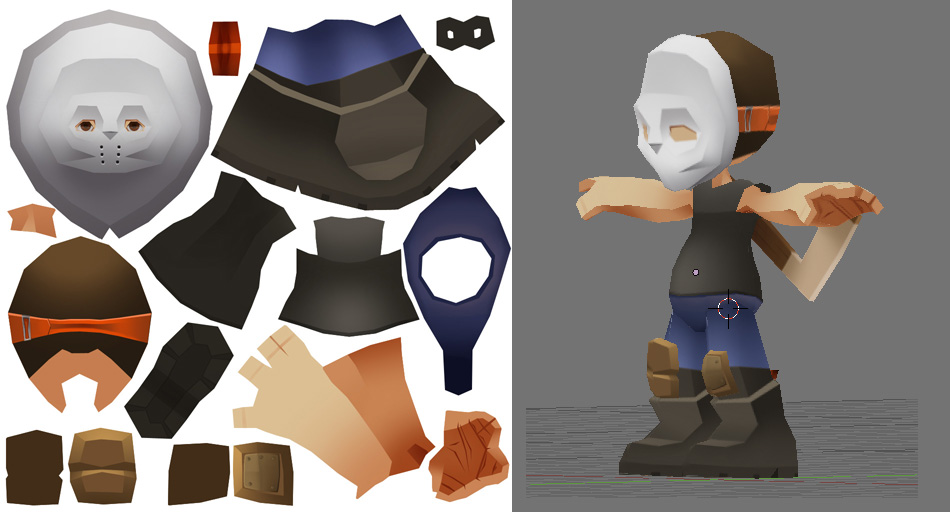
Step 5. More Details
At this point, I pulled out my tablet and started painting in some clothing shadows, the kind of stuff I can't easily do with a mouse. Even more details are added.
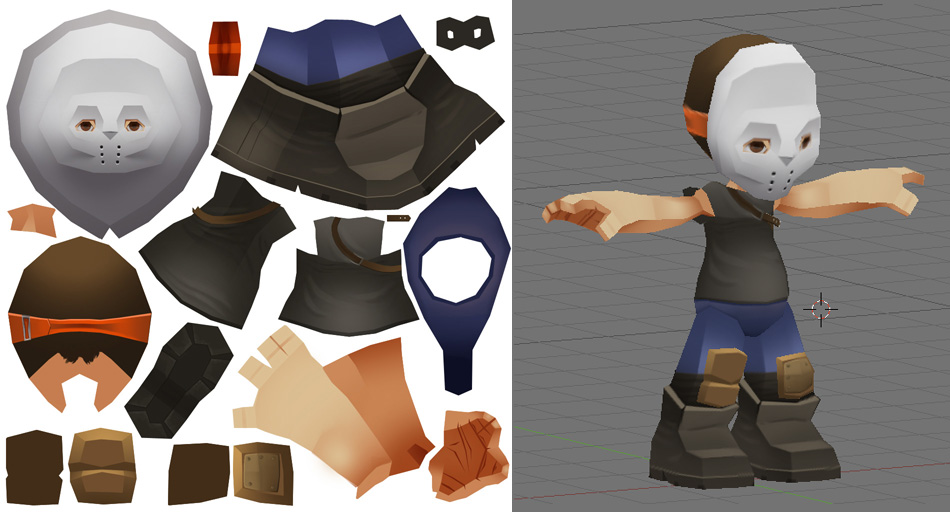
That's where he stands so far. I have some hair to figure out.
Step 1. Color blocking
Here's where I go through and put down solid colors. When you apply it to your character, it's going to look like CRAP. That's because there's no lighting or details.
Step 2. Basic shadows and highlights
Some games utilize lighting, others don't. I like to paint in my lighting directly on the character. And I usually paint as if the light source is from above. I take liberties with that rule, though. If something needs a bit of highlight, I try to go for it. It's amazing how much better the character looks with some subtle gradients hinting at a light source.
Step 3. More shadows and highlights
I continue on with the process of adding more shadows and highlights. These characters are blocky by design, so I don't mind using harsh shadow lines in some places.
Step 4. Details
Here I start trying to lay down a lot of the detail work in order to further develop the character. At this point, I also start thinking about contrast, and I try to push the shadows even further. The character was screencapped before this stage of texture was done, that's why he doesn't have eyes.
Step 5. More Details
At this point, I pulled out my tablet and started painting in some clothing shadows, the kind of stuff I can't easily do with a mouse. Even more details are added.
That's where he stands so far. I have some hair to figure out.
Friday, March 18, 2011
Tutorial: Modeling
This tutorial aims at creating a character of 1800 polys.
Things to remember:
Add Loop tool = ctrl + R
Select Loop = option + cmd(RMB)
Scale selection along normals = option + S
The video is quite long so I've included time markers so you know what begins when.
00:00 - Intro
04:40 - Begin Modeling
07:56 - Leg Modeling
12:37 - Knee Modeling
14:56 - Foot Modeling
22:08 - Chest/Stomach Refining
23:06 - Arms Modeling
29:25 - Hands Modeling
37:37 - Head Modeling
49:10 - Added Details
Things to remember:
Add Loop tool = ctrl + R
Select Loop = option + cmd(RMB)
Scale selection along normals = option + S
The video is quite long so I've included time markers so you know what begins when.
00:00 - Intro
04:40 - Begin Modeling
07:56 - Leg Modeling
12:37 - Knee Modeling
14:56 - Foot Modeling
22:08 - Chest/Stomach Refining
23:06 - Arms Modeling
29:25 - Hands Modeling
37:37 - Head Modeling
49:10 - Added Details
Wednesday, March 16, 2011
Low Poly Tip #2
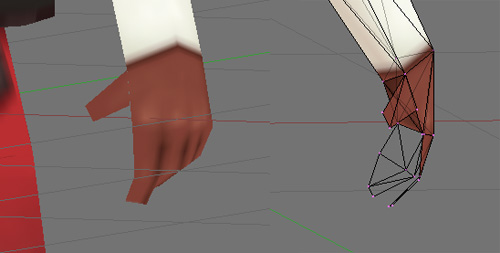
Here's another way of reducing polys. I'd only do this if you're never going to get a close up on the hand. Still, helpful to know, though. Model your fingers as planes, and curving them in such a way that they never appear fully flat.
Low Poly Tip #1
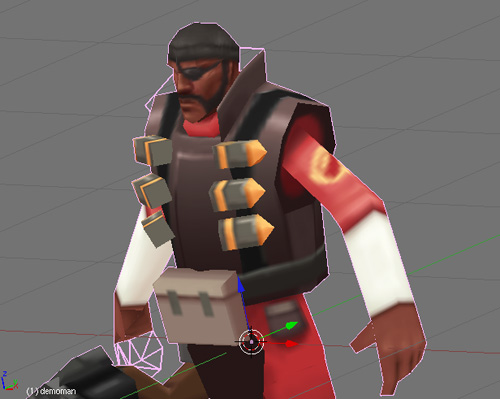
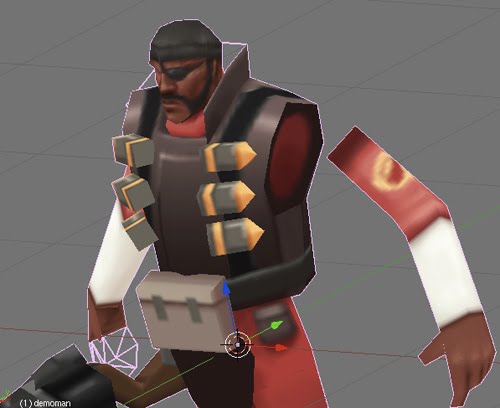
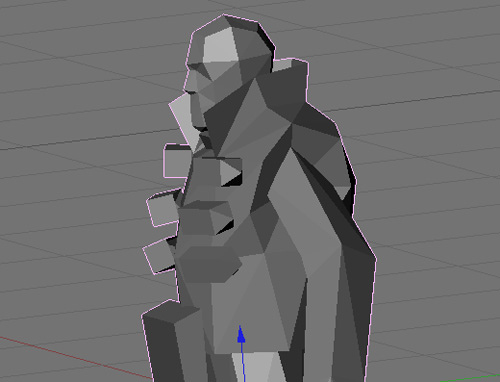
Going through Tom Tallian's pack of low-poly Team Fortress models, I noticed a trick he was using in order to keep his meshes low on polygons. Not everything must share the same and extend from the same points. Instead, the limbs are sometimes modeled separetely and just made to look like they are "attached". Reminds me of how action figures are assembled.
Wednesday, March 9, 2011


Reference: Yuna, FFX-2
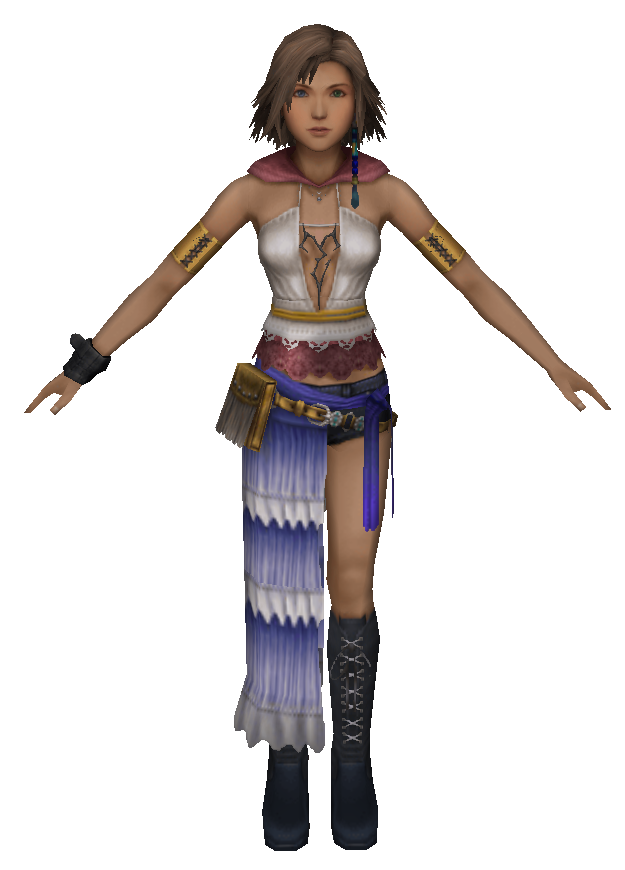
I came across this nice little treat today. Someone extracted (I believe) the Yuna model from Final Fantasy X-2 and put it available for download. The file is a .ms3d, which is native to Milkshape3d. Unfortunately, I cannot open it because Milkshake3D is PC only. So if anyone wants to download it, Milkshape3d is free, and it might be nice to be able to check out some of that low poly hair. And if you do, any chance of exporting it to a .obj so I can check it out? (wink wink)
Survivor Yuna FF X-2
Milkshape3D
Here's some images, including texture maps! (256x256)!!!
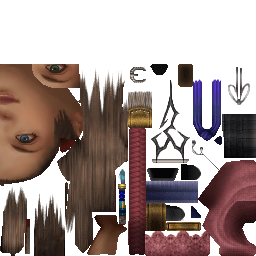
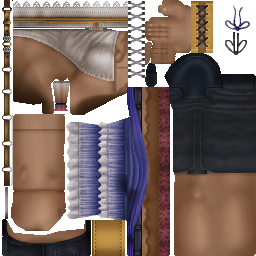
Survivor Yuna FF X-2
Milkshape3D
Here's some images, including texture maps! (256x256)!!!
Friday, March 4, 2011
Sword&Shield
This is one of the smoothest games created in Blender that I've seen so far. Though just a series of demos, this demonstrates how games in Blender can be both visually appealing and not very processor intensive.
Thursday, March 3, 2011
Old School Updates
Great examples of old style games brought to 3d. I'd love see some more of these. The first is made in Blender, the second I believe in 3DS Max.
Saturday, February 19, 2011
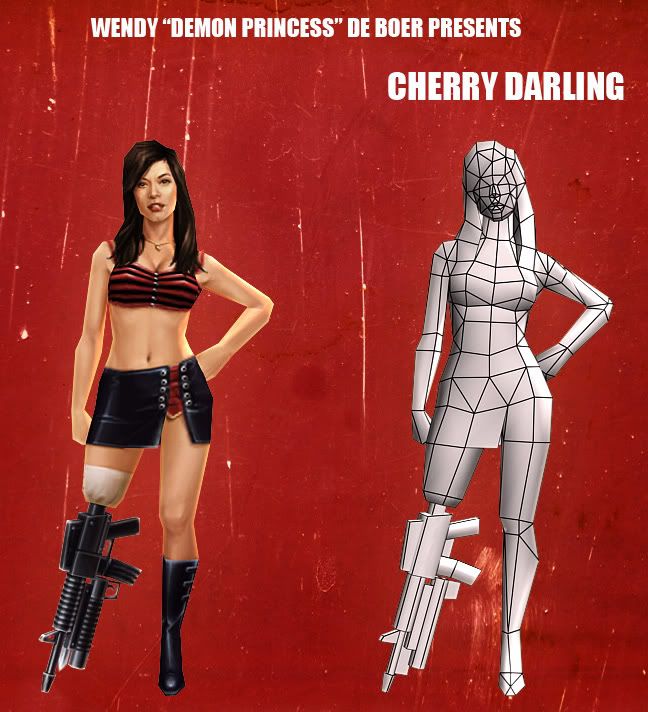
Reference: Cherry Darling
This is a great example of a how a low poly model with great textures can used to capture the likeness of a film character. Check the source for more.

Friday, February 18, 2011
Manga Blur - Low Poly Model
Very low poly! 100 polys on this character, rigged and animated. This video also includes wireframe mode!
Wednesday, February 16, 2011
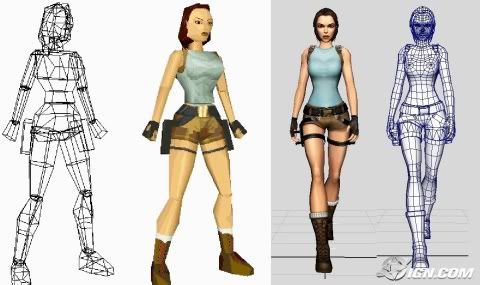
Reference: Lara Croft Wireframe
A comparison of the first model of Lara Croft compared to the one used in current-gen systems.

Tommy Tallian
Check out the work of Tommy Tallian, a fine example of low poly characters created for video games. Also a good way to see how his UV textures have been organized.

Tommy Tallian
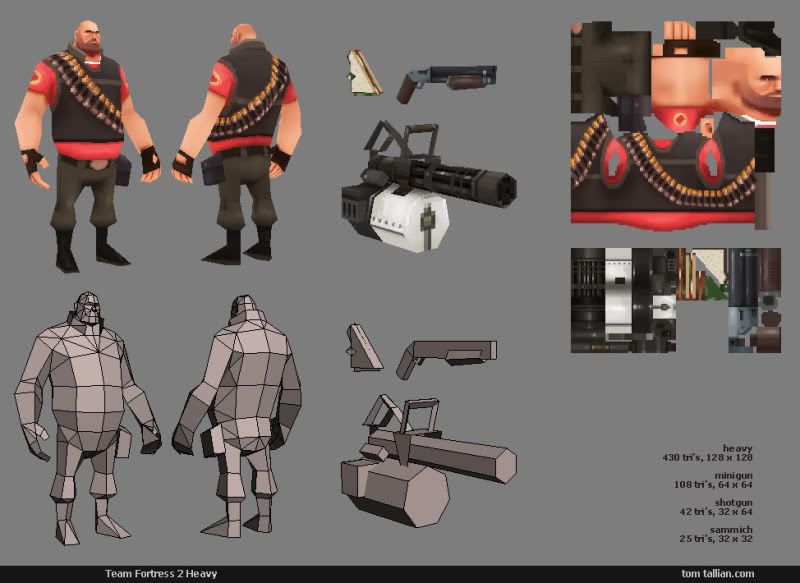
Tommy Tallian
Subscribe to:
Posts (Atom)