Showing posts with label reference. Show all posts
Wednesday, April 10, 2013
Reference: Shadow of the Collossus
I recently stumbled on a great blogpost that might be helpful for you modelers and texturers. Froyok investigates the models of one of the best looking games on PS2, Shadow of the Collosus, which is also one of my personal favorite games. Lots of screenshots of the models themselves, both textured and wireframes, and lots of miscellaneous information. Definitely check it out. And don't stop there, Froyok does great 2d and 3d work of his own, and has other game breakdowns for Arkham Asylum and Assassin's Creed 2.
[breakdown] Shadow of the Colossus (PAL - PS2) | Froyok
Saturday, October 22, 2011
Other Real Time Water Examples
To follow up the last post, here's a couple other demos I've found on Youtube that use the same method of creating real time water for use in the Blender Game Engine.
Sunday, July 17, 2011
ShermanCG, Swords

I stumbled upon this fantastic set of swords done by Isaiah Sherman. I really appreciate the progressive change in the designs. The textures are sweet, too. Looking forward to seeing more from this guy. Check out the link to his page, there are wireframes, textures and concept sketches for this set.
ShermanCG, Swords
Saturday, July 16, 2011
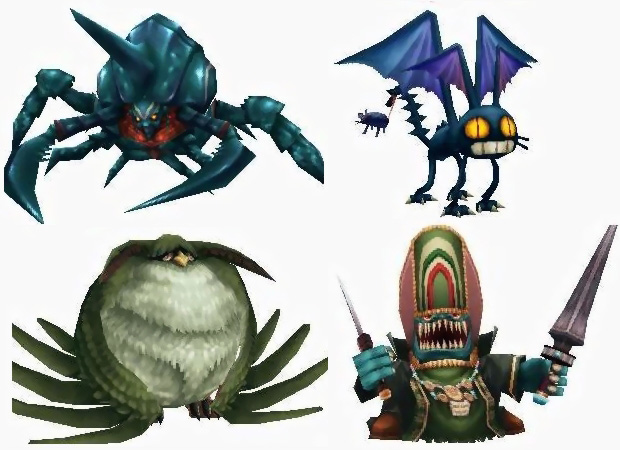
FF9, Bestiary

I've always admired Squaresoft's work in their video games, as well as the world created for Final Fantasy IX (for the most part). Here's a grid of the enemies you encounter throughout the game. The images aren't too big, and I wish there were some wireframes and texture examples out there somewhere, but this is a decent reference.
edit: I noticed the last link doesn't work anymore. Here's a new one: FF9 Bestiary
Monday, March 21, 2011
Tutorial/Reference: Texturing Casey Jones
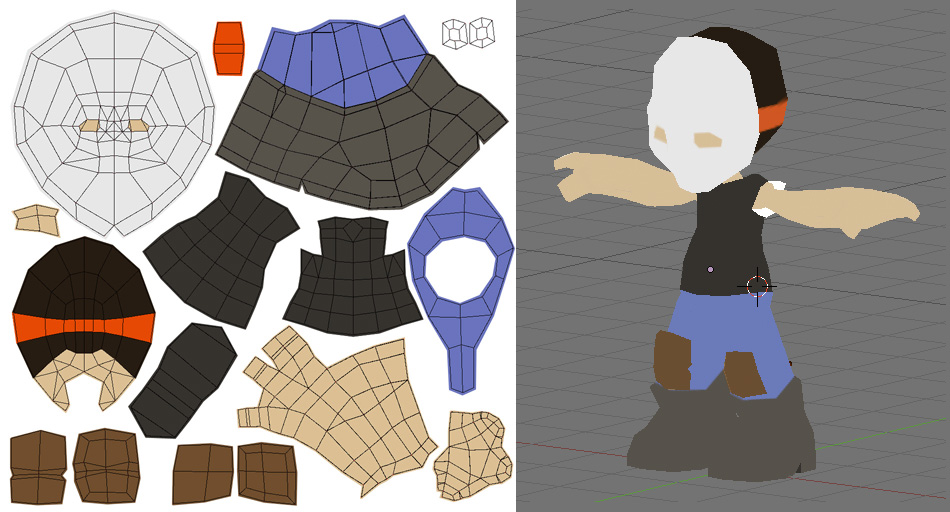
I thought it'd be handy if I documented some of the steps I take when texturing a character. Click on any picture to see a larger version. Keep in mind, there's many steps in between. I often have to try different highlights and reload it to the character to make sure it works. These are the major steps.
Step 1. Color blocking
Here's where I go through and put down solid colors. When you apply it to your character, it's going to look like CRAP. That's because there's no lighting or details.
Step 2. Basic shadows and highlights
Some games utilize lighting, others don't. I like to paint in my lighting directly on the character. And I usually paint as if the light source is from above. I take liberties with that rule, though. If something needs a bit of highlight, I try to go for it. It's amazing how much better the character looks with some subtle gradients hinting at a light source.
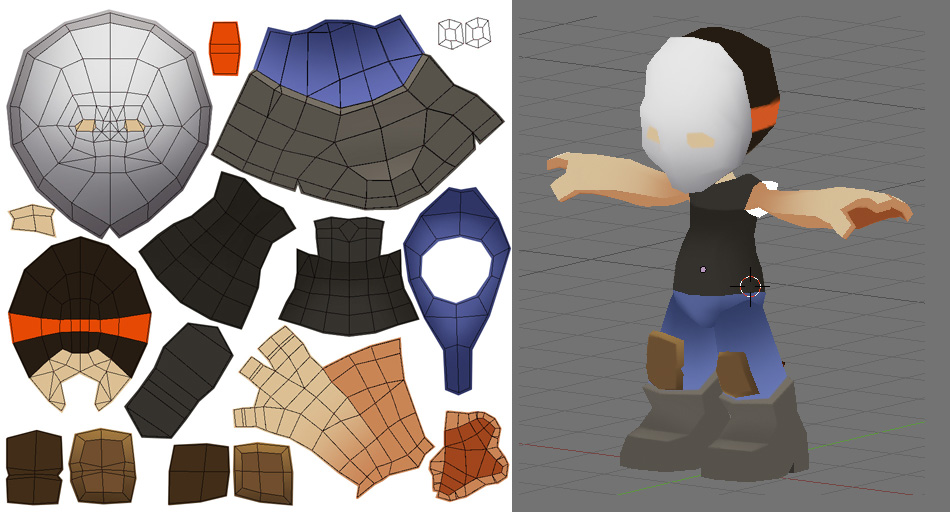
Step 3. More shadows and highlights
I continue on with the process of adding more shadows and highlights. These characters are blocky by design, so I don't mind using harsh shadow lines in some places.
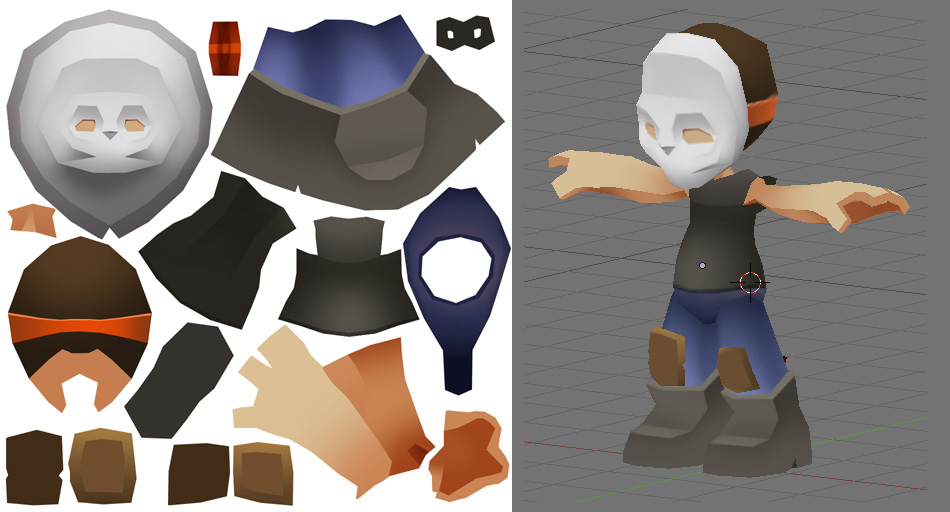
Step 4. Details
Here I start trying to lay down a lot of the detail work in order to further develop the character. At this point, I also start thinking about contrast, and I try to push the shadows even further. The character was screencapped before this stage of texture was done, that's why he doesn't have eyes.
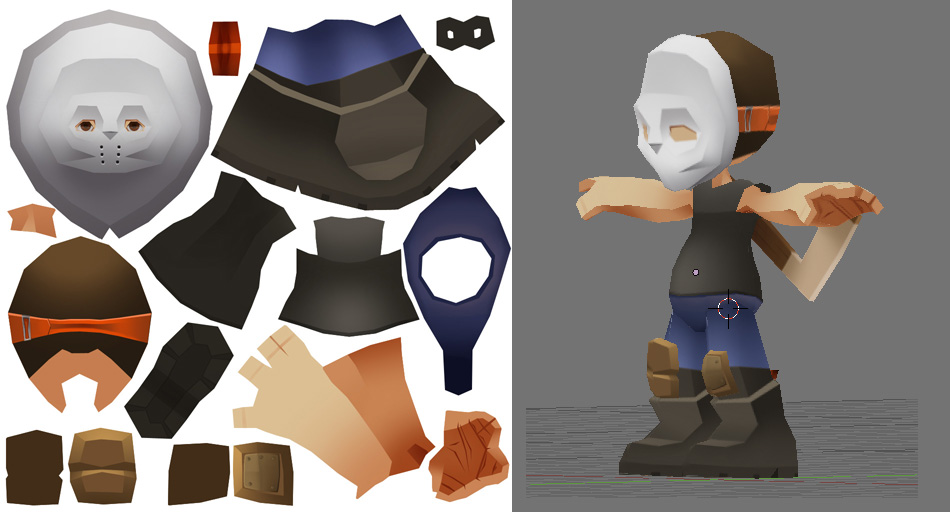
Step 5. More Details
At this point, I pulled out my tablet and started painting in some clothing shadows, the kind of stuff I can't easily do with a mouse. Even more details are added.
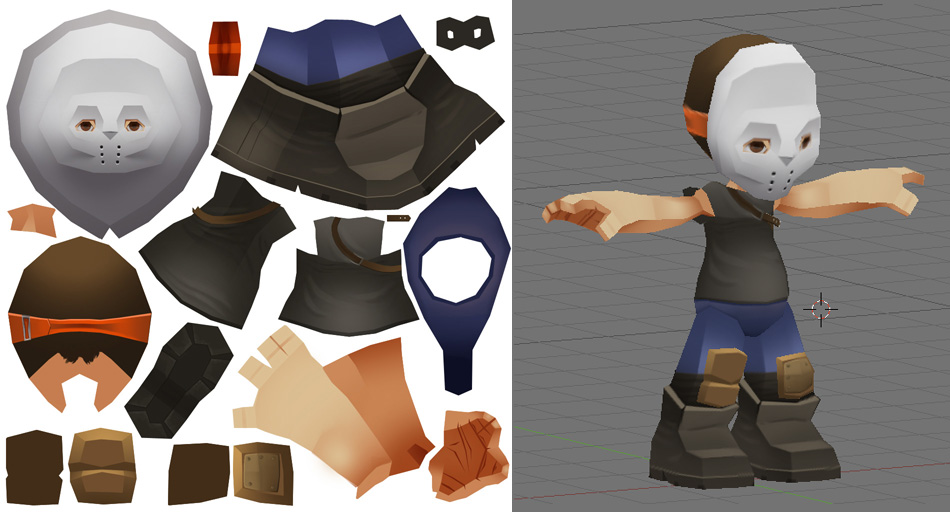
That's where he stands so far. I have some hair to figure out.
Step 1. Color blocking
Here's where I go through and put down solid colors. When you apply it to your character, it's going to look like CRAP. That's because there's no lighting or details.

Step 2. Basic shadows and highlights
Some games utilize lighting, others don't. I like to paint in my lighting directly on the character. And I usually paint as if the light source is from above. I take liberties with that rule, though. If something needs a bit of highlight, I try to go for it. It's amazing how much better the character looks with some subtle gradients hinting at a light source.

Step 3. More shadows and highlights
I continue on with the process of adding more shadows and highlights. These characters are blocky by design, so I don't mind using harsh shadow lines in some places.

Step 4. Details
Here I start trying to lay down a lot of the detail work in order to further develop the character. At this point, I also start thinking about contrast, and I try to push the shadows even further. The character was screencapped before this stage of texture was done, that's why he doesn't have eyes.

Step 5. More Details
At this point, I pulled out my tablet and started painting in some clothing shadows, the kind of stuff I can't easily do with a mouse. Even more details are added.

That's where he stands so far. I have some hair to figure out.
Wednesday, March 9, 2011
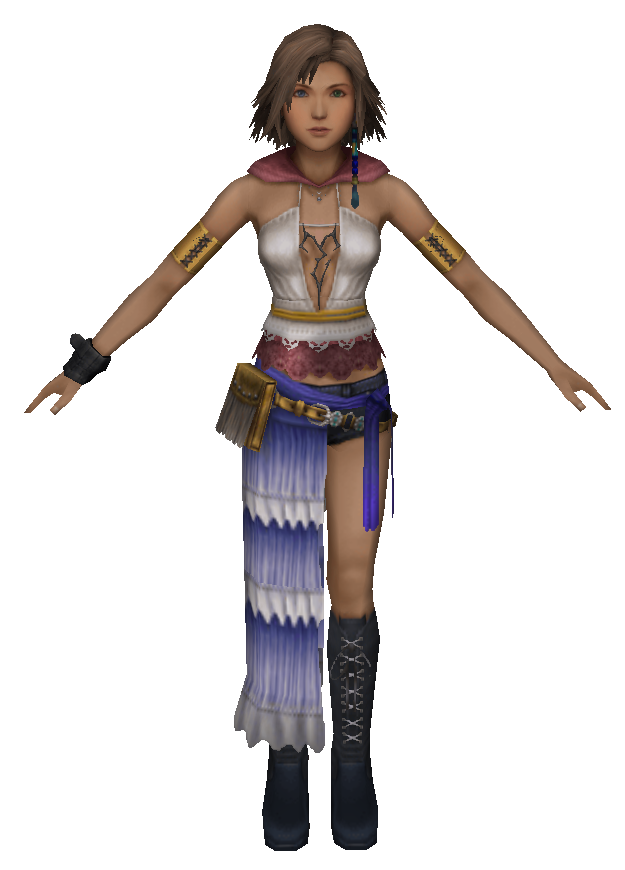
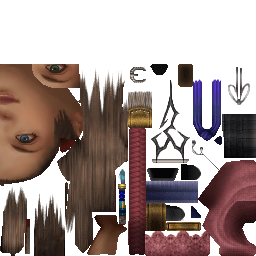
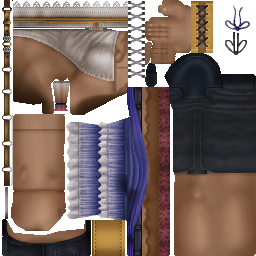
Reference: Yuna, FFX-2
I came across this nice little treat today. Someone extracted (I believe) the Yuna model from Final Fantasy X-2 and put it available for download. The file is a .ms3d, which is native to Milkshape3d. Unfortunately, I cannot open it because Milkshake3D is PC only. So if anyone wants to download it, Milkshape3d is free, and it might be nice to be able to check out some of that low poly hair. And if you do, any chance of exporting it to a .obj so I can check it out? (wink wink)
Survivor Yuna FF X-2
Milkshape3D
Here's some images, including texture maps! (256x256)!!!


Survivor Yuna FF X-2
Milkshape3D
Here's some images, including texture maps! (256x256)!!!


Wednesday, March 2, 2011
Reference: Modeling/Texturing

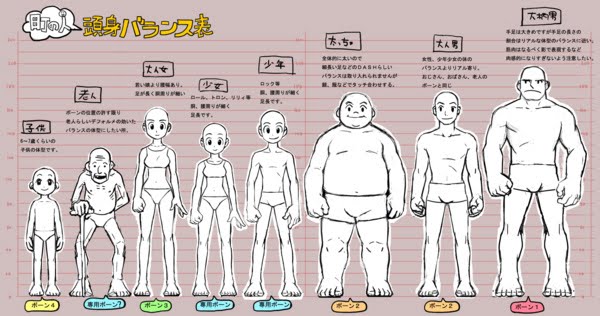
Always nice to see how the pros work. Also a good idea is how they have a character map to compare individual heights..

3D Modeling (Modeling)
3D Modeling Part 2 (Modeling/Texturing)
3D Modeling Part 3 (Texturing Process)
Wednesday, February 23, 2011
Reference: Actions
Ah yes, one of those "holy ****" moments where everything comes to light. Actions have been driving me crazy. It started to seem necessary to have keyframes at the head of every animation/action. But why!? Ah duh! You don't need some of those beginning keyframes if you wanted to blend two actions!!!
Labels:
action editor,
animating,
blender 2.49,
reference
Reference: Blender's Action Editor
Some handy info on Blender's Action Editor for animation.
Labels:
action editor,
animating,
blender 2.49,
reference
Saturday, February 19, 2011
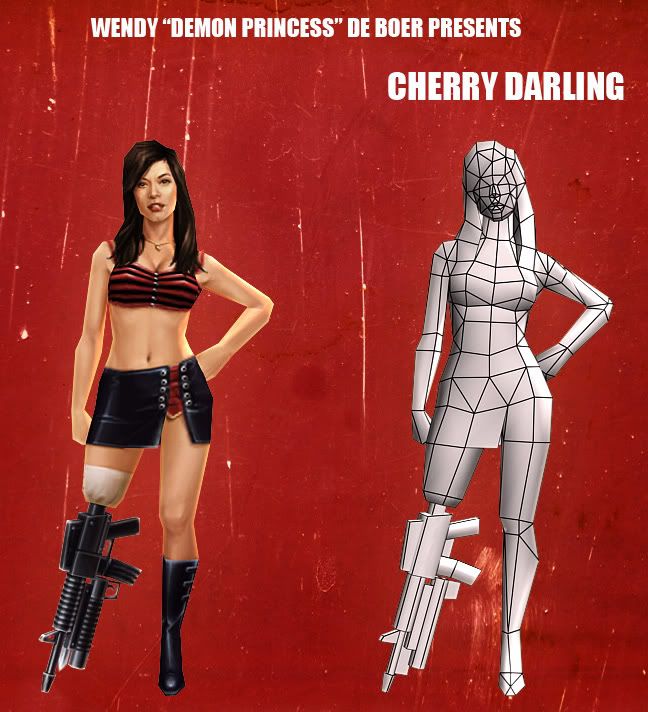
Reference: Cherry Darling
This is a great example of a how a low poly model with great textures can used to capture the likeness of a film character. Check the source for more.
Wednesday, February 16, 2011
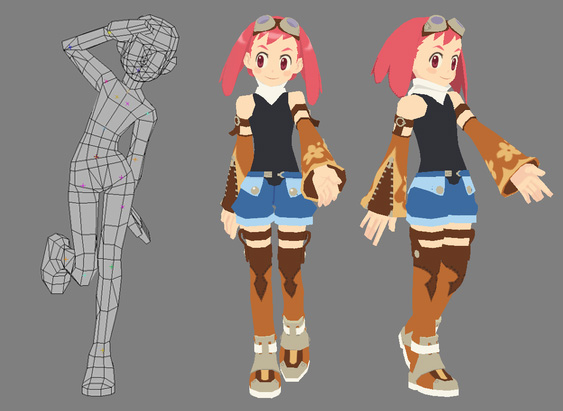
Reference: Textures - Shining Force EXA
A good look at how developers of Shining Force EXA have achieved a look that reflects the illustrative style of their character designs.
Subscribe to:
Posts (Atom)