
Showing posts with label tutorial. Show all posts
Showing posts with label tutorial. Show all posts
Tuesday, October 18, 2011
Real Time Water Tutorial
Not sure if I've posted this one up yet, but the folks at YoFrankie! have posted an indepth tutorial on creating animated water in real time for use within the Blender Game Engine. The effect is achieved using Normal Maps mapped onto a flat plane. Photoshop or another graphic editor is required for this. The graphic part is fairly tedious, and somewhat time consuming. But once it's done, you have your own water maps to use over and over!
UPDATE: Finally recorded a video of my own after following the tutorial

Wednesday, July 27, 2011
Blender Game Engine Tutorial
A useful video on how to texture a level with the use of texture atlases. The video says "Part 1" but I don't think the author has gotten around to making a Part 2 yet.
Sunday, July 17, 2011
Tutorial, Video Game Prop Modeling
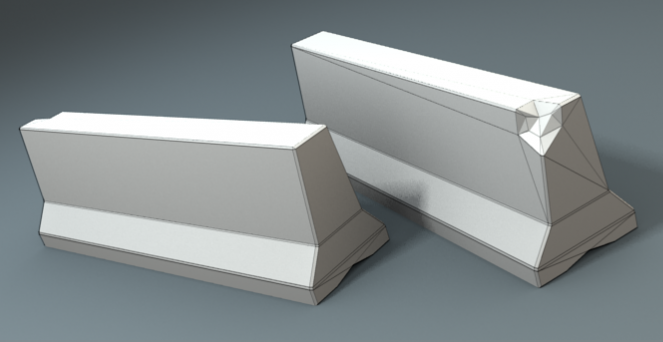
I found a simple tutorial over at BlenderCookie. While the model itself isn't the most exciting, he goes over a lot of the fundamental thinking that is involved when modeling props for video games. It's important to remember that optimizing your model for the lowest amount of polygons, while still maintaining the basic shape of your model, should be the most important thing. The video is a bit lengthy but there's a lot of useful techniques, including keystrokes for the UV layout that I wasn't aware of.
Part 01
Part 02
Thursday, March 24, 2011
Wednesday, March 23, 2011
Tutorial: Rigging, Mechanical
I've started thinking about modeling robotic characters in the future, and how they can't be rigged exactly the same as organic characters. Organic characters need to be able to bend and change shape, but mechanical objects shouldn't (usually). These tutorials show how to rig a mechanical arm, and should suffice with rigging any mechanical character or object. This tutorial was done in Blender 2.5, but the theories should apply to 2.49.
One thing to remember, these tutorials assume each mechanical part is a separate object. If you designed a robotic character, most likely, you'll want all objects to be separate meshes in a single object, and you'd need to weight paint each bone to affect each part in the same way.
Key points:
PART 1
Creat Armature
E = Extrude Tool, extrude new bone from previously selected bone
Shift + S (while end of bone is selected)/Selection to Cursor = to move the endpoint to your previous selected vertices.
Clear Roll = once armature is finished to clear any unnecessary rotations for each bone (17:40)
Add Constraints to lock down certain rotations and location of each bone (24:50)
PART 2
Create IK Constraints
One thing to remember, these tutorials assume each mechanical part is a separate object. If you designed a robotic character, most likely, you'll want all objects to be separate meshes in a single object, and you'd need to weight paint each bone to affect each part in the same way.
Key points:
PART 1
Creat Armature
E = Extrude Tool, extrude new bone from previously selected bone
Shift + S (while end of bone is selected)/Selection to Cursor = to move the endpoint to your previous selected vertices.
Clear Roll = once armature is finished to clear any unnecessary rotations for each bone (17:40)
Add Constraints to lock down certain rotations and location of each bone (24:50)
PART 2
Create IK Constraints
Friday, March 18, 2011
Tutorial: Modeling
This tutorial aims at creating a character of 1800 polys.
Things to remember:
Add Loop tool = ctrl + R
Select Loop = option + cmd(RMB)
Scale selection along normals = option + S
The video is quite long so I've included time markers so you know what begins when.
00:00 - Intro
04:40 - Begin Modeling
07:56 - Leg Modeling
12:37 - Knee Modeling
14:56 - Foot Modeling
22:08 - Chest/Stomach Refining
23:06 - Arms Modeling
29:25 - Hands Modeling
37:37 - Head Modeling
49:10 - Added Details
Things to remember:
Add Loop tool = ctrl + R
Select Loop = option + cmd(RMB)
Scale selection along normals = option + S
The video is quite long so I've included time markers so you know what begins when.
00:00 - Intro
04:40 - Begin Modeling
07:56 - Leg Modeling
12:37 - Knee Modeling
14:56 - Foot Modeling
22:08 - Chest/Stomach Refining
23:06 - Arms Modeling
29:25 - Hands Modeling
37:37 - Head Modeling
49:10 - Added Details
Tuesday, February 22, 2011
Tutorial: Weight Painting
Some useful info on how to weight paint your character rig when blender's auto weight-assign needs some fixing.
Wednesday, February 16, 2011
Tutorial - Peter's Massive Blender Tutorials (Texturing)
The following is the next chapter in Peter's Blender tutorials and focuses on character rigging, however I don't recommend following it since I had a few problems with it. I'm posting it for reference. I have a better character rigging tutorial coming up in the next post.
Subscribe to:
Posts (Atom)