
Showing posts with label texturing. Show all posts
Showing posts with label texturing. Show all posts
Tuesday, March 25, 2014

Wednesday, July 27, 2011
Blender Game Engine Tutorial
A useful video on how to texture a level with the use of texture atlases. The video says "Part 1" but I don't think the author has gotten around to making a Part 2 yet.
Sunday, July 24, 2011
Rocksteady

Here's a progression of the texture work I did for Rocksteady. Similar to the Casey Jones one.


Monday, March 21, 2011
Tutorial/Reference: Texturing Casey Jones
I thought it'd be handy if I documented some of the steps I take when texturing a character. Click on any picture to see a larger version. Keep in mind, there's many steps in between. I often have to try different highlights and reload it to the character to make sure it works. These are the major steps.
Step 1. Color blocking
Here's where I go through and put down solid colors. When you apply it to your character, it's going to look like CRAP. That's because there's no lighting or details.
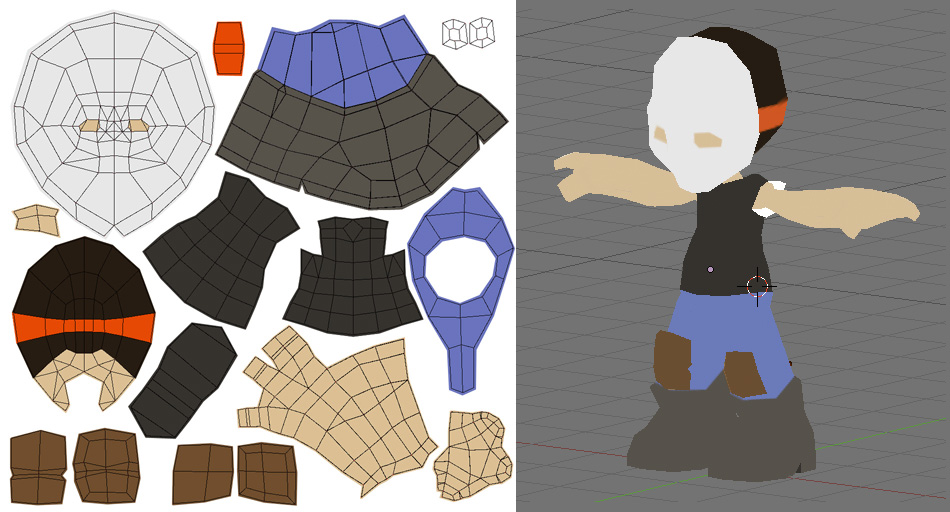
Step 2. Basic shadows and highlights
Some games utilize lighting, others don't. I like to paint in my lighting directly on the character. And I usually paint as if the light source is from above. I take liberties with that rule, though. If something needs a bit of highlight, I try to go for it. It's amazing how much better the character looks with some subtle gradients hinting at a light source.
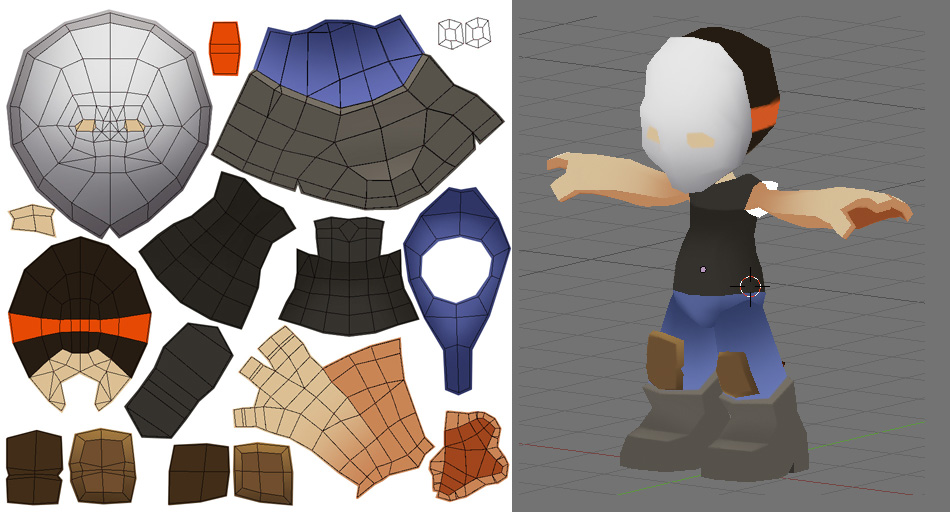
Step 3. More shadows and highlights
I continue on with the process of adding more shadows and highlights. These characters are blocky by design, so I don't mind using harsh shadow lines in some places.
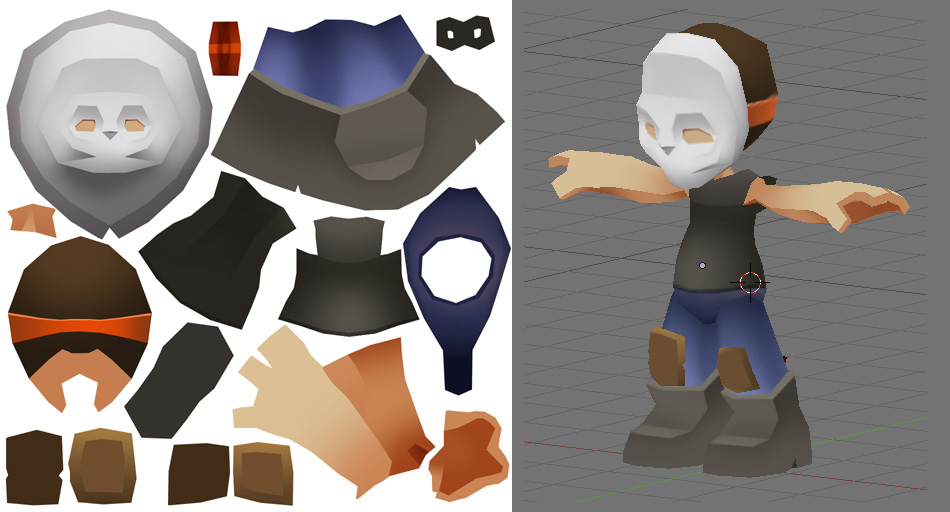
Step 4. Details
Here I start trying to lay down a lot of the detail work in order to further develop the character. At this point, I also start thinking about contrast, and I try to push the shadows even further. The character was screencapped before this stage of texture was done, that's why he doesn't have eyes.
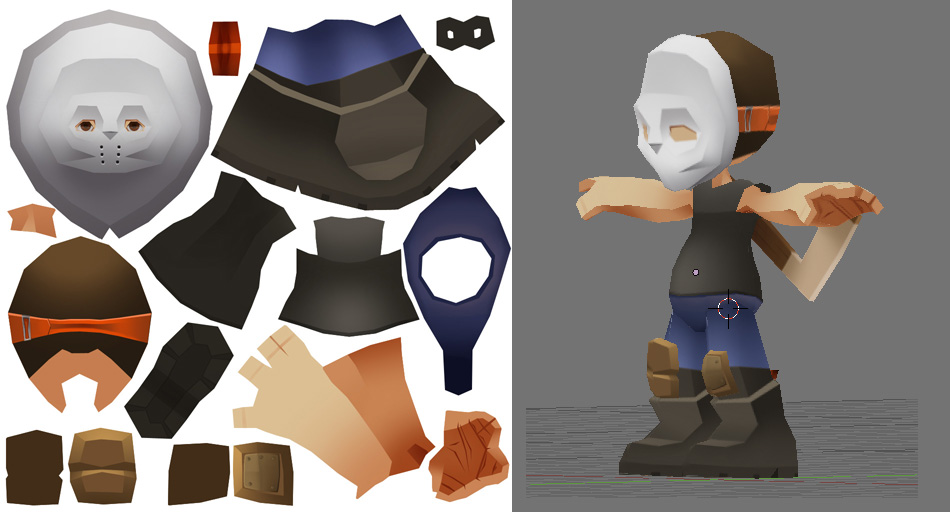
Step 5. More Details
At this point, I pulled out my tablet and started painting in some clothing shadows, the kind of stuff I can't easily do with a mouse. Even more details are added.
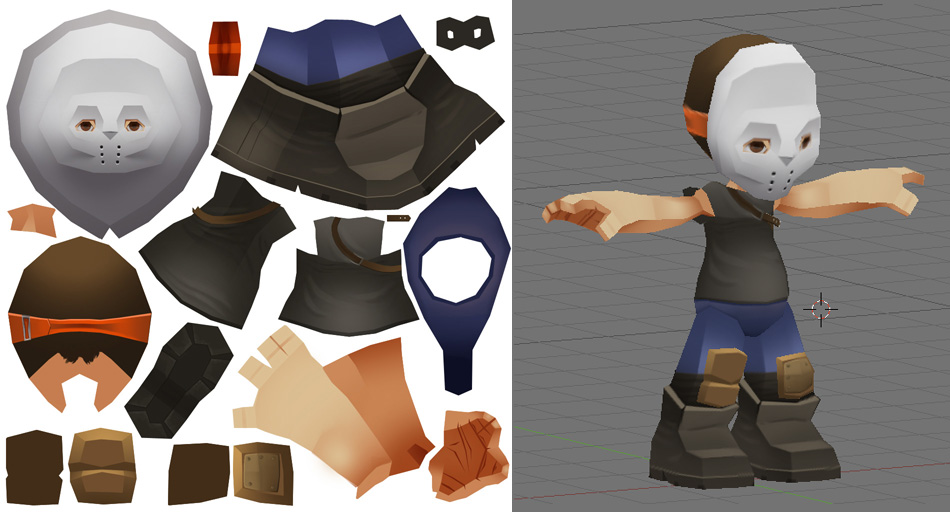
That's where he stands so far. I have some hair to figure out.
Step 1. Color blocking
Here's where I go through and put down solid colors. When you apply it to your character, it's going to look like CRAP. That's because there's no lighting or details.
Step 2. Basic shadows and highlights
Some games utilize lighting, others don't. I like to paint in my lighting directly on the character. And I usually paint as if the light source is from above. I take liberties with that rule, though. If something needs a bit of highlight, I try to go for it. It's amazing how much better the character looks with some subtle gradients hinting at a light source.
Step 3. More shadows and highlights
I continue on with the process of adding more shadows and highlights. These characters are blocky by design, so I don't mind using harsh shadow lines in some places.
Step 4. Details
Here I start trying to lay down a lot of the detail work in order to further develop the character. At this point, I also start thinking about contrast, and I try to push the shadows even further. The character was screencapped before this stage of texture was done, that's why he doesn't have eyes.
Step 5. More Details
At this point, I pulled out my tablet and started painting in some clothing shadows, the kind of stuff I can't easily do with a mouse. Even more details are added.
That's where he stands so far. I have some hair to figure out.
Wednesday, March 2, 2011
Reference: Modeling/Texturing
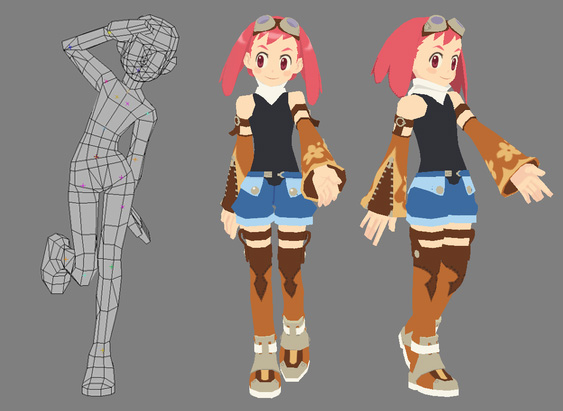
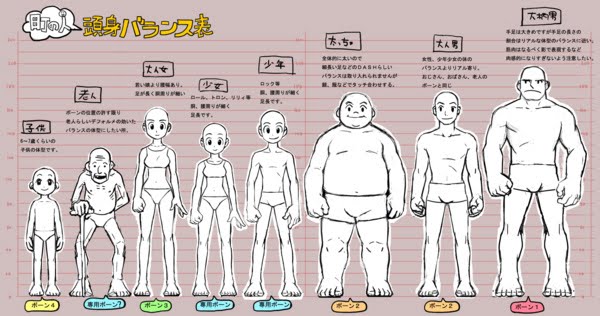
Always nice to see how the pros work. Also a good idea is how they have a character map to compare individual heights..
3D Modeling (Modeling)
3D Modeling Part 2 (Modeling/Texturing)
3D Modeling Part 3 (Texturing Process)
Saturday, February 19, 2011
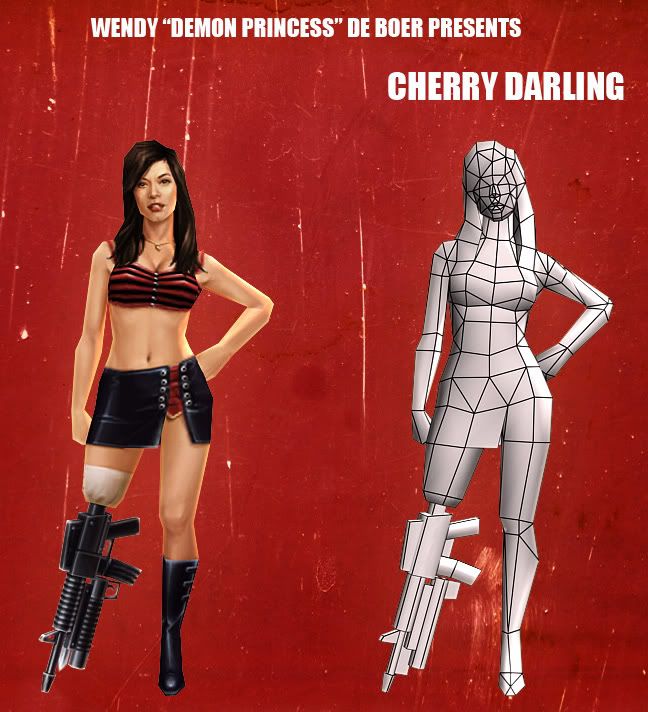
Reference: Cherry Darling
This is a great example of a how a low poly model with great textures can used to capture the likeness of a film character. Check the source for more.

Wednesday, February 16, 2011
Reference: Textures - Shining Force EXA
A good look at how developers of Shining Force EXA have achieved a look that reflects the illustrative style of their character designs.
Tommy Tallian
Check out the work of Tommy Tallian, a fine example of low poly characters created for video games. Also a good way to see how his UV textures have been organized.

Tommy Tallian
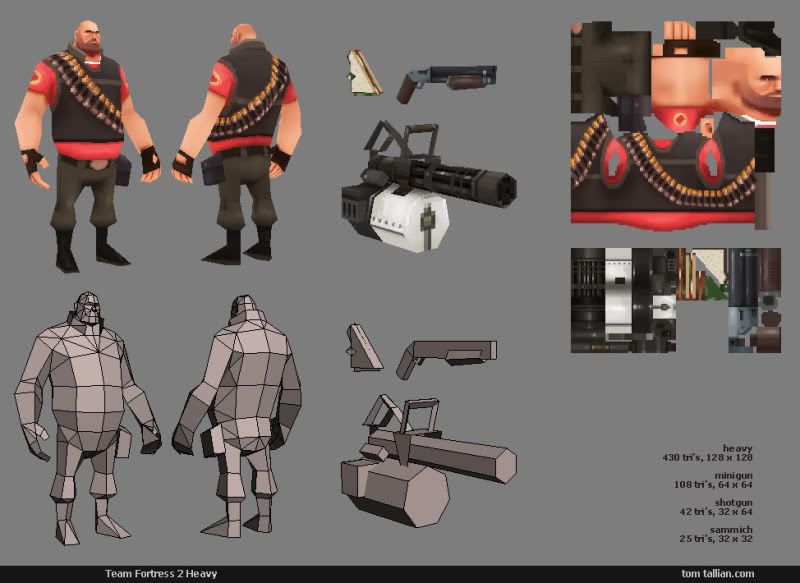
Tommy Tallian
Tutorial - Peter's Massive Blender Tutorials (Texturing)
The following is the next chapter in Peter's Blender tutorials and focuses on character rigging, however I don't recommend following it since I had a few problems with it. I'm posting it for reference. I have a better character rigging tutorial coming up in the next post.
Subscribe to:
Posts (Atom)