
Wednesday, July 27, 2011
Blender Game Engine Tutorial
A useful video on how to texture a level with the use of texture atlases. The video says "Part 1" but I don't think the author has gotten around to making a Part 2 yet.

Sunday, July 24, 2011
Rocksteady

Here's a progression of the texture work I did for Rocksteady. Similar to the Casey Jones one.


Sunday, July 17, 2011
ShermanCG, Swords

I stumbled upon this fantastic set of swords done by Isaiah Sherman. I really appreciate the progressive change in the designs. The textures are sweet, too. Looking forward to seeing more from this guy. Check out the link to his page, there are wireframes, textures and concept sketches for this set.
ShermanCG, Swords
Tutorial, Video Game Prop Modeling
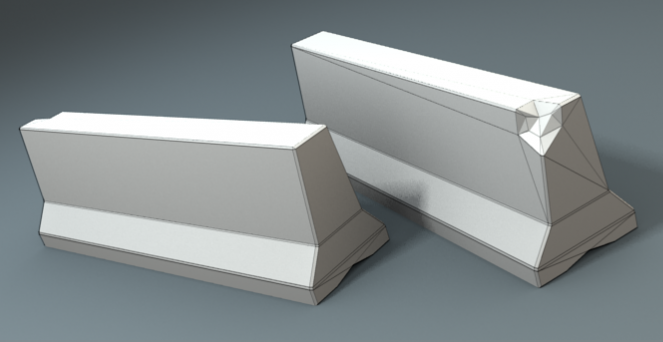
I found a simple tutorial over at BlenderCookie. While the model itself isn't the most exciting, he goes over a lot of the fundamental thinking that is involved when modeling props for video games. It's important to remember that optimizing your model for the lowest amount of polygons, while still maintaining the basic shape of your model, should be the most important thing. The video is a bit lengthy but there's a lot of useful techniques, including keystrokes for the UV layout that I wasn't aware of.
Part 01
Part 02
Saturday, July 16, 2011
FF9, Bestiary
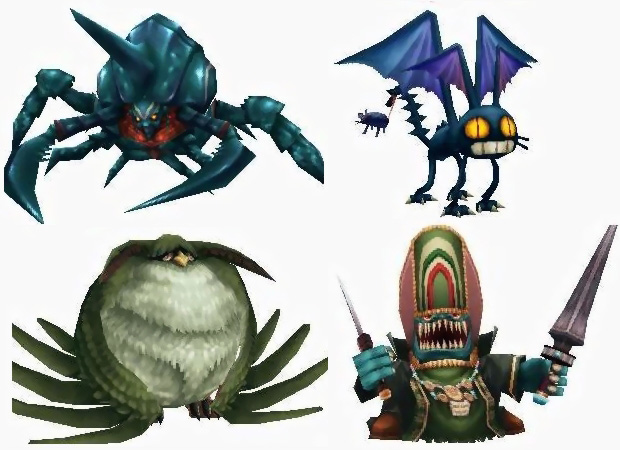
I've always admired Squaresoft's work in their video games, as well as the world created for Final Fantasy IX (for the most part). Here's a grid of the enemies you encounter throughout the game. The images aren't too big, and I wish there were some wireframes and texture examples out there somewhere, but this is a decent reference.

edit: I noticed the last link doesn't work anymore. Here's a new one: FF9 Bestiary

Thursday, March 24, 2011
Wednesday, March 23, 2011
Tutorial: Rigging, Mechanical
I've started thinking about modeling robotic characters in the future, and how they can't be rigged exactly the same as organic characters. Organic characters need to be able to bend and change shape, but mechanical objects shouldn't (usually). These tutorials show how to rig a mechanical arm, and should suffice with rigging any mechanical character or object. This tutorial was done in Blender 2.5, but the theories should apply to 2.49.
One thing to remember, these tutorials assume each mechanical part is a separate object. If you designed a robotic character, most likely, you'll want all objects to be separate meshes in a single object, and you'd need to weight paint each bone to affect each part in the same way.
Key points:
PART 1
Creat Armature
E = Extrude Tool, extrude new bone from previously selected bone
Shift + S (while end of bone is selected)/Selection to Cursor = to move the endpoint to your previous selected vertices.
Clear Roll = once armature is finished to clear any unnecessary rotations for each bone (17:40)
Add Constraints to lock down certain rotations and location of each bone (24:50)
PART 2
Create IK Constraints
One thing to remember, these tutorials assume each mechanical part is a separate object. If you designed a robotic character, most likely, you'll want all objects to be separate meshes in a single object, and you'd need to weight paint each bone to affect each part in the same way.
Key points:
PART 1
Creat Armature
E = Extrude Tool, extrude new bone from previously selected bone
Shift + S (while end of bone is selected)/Selection to Cursor = to move the endpoint to your previous selected vertices.
Clear Roll = once armature is finished to clear any unnecessary rotations for each bone (17:40)
Add Constraints to lock down certain rotations and location of each bone (24:50)
PART 2
Create IK Constraints
Subscribe to:
Posts (Atom)